linux 内核编译
本文主要记录内核编译的步骤
首先来说下编译内核是怎么实现的,其实这方面网上有很多教程,也有很多博客讲到来这点,但是就我个人经验而言,我会将最简洁但又实用的办法分享出来,大概就几条命令的事吧(以下命令均在root下运行)。
- make menuconfig
选择需要模块化的地方,正确的话会出现下述画面。
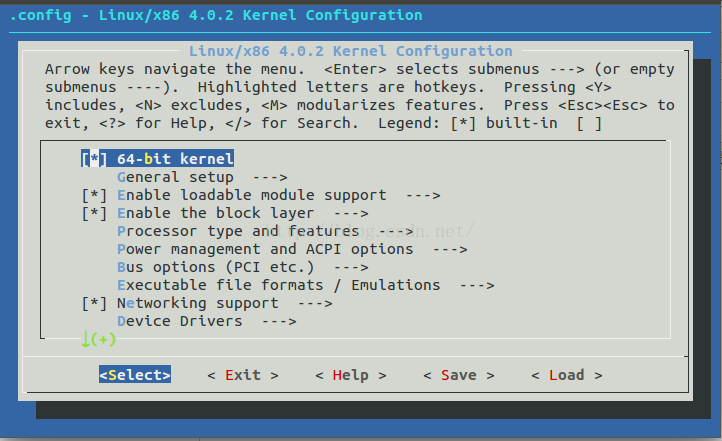
如果出现错误,则缺少相应的文件,此时执行 apt-get install libncurses5-dev libncursesw5-dev libelf-dev libssl-dev flex bison dpkg-dev -y,然后再执行make menuconfig即可。
此时需要选择需要模块化的地方,我当时是为将文件系统模块化,所以进入file system,通过空格来选‘M’还是‘*’,M表示模块化,*表示编译内核时就将该模块编译进去,后期无法自由删除修改。所以,在file system上面对所有条目而言,能选‘M’的都选‘M’,不能选的再选‘*’。最后保存下结果即可。
compile locally
- make -j4
编译5.4内核时需要签名文件。
在.config中注释掉如下两行:
1 | #CONFIG_MODULE_SIG_KEY="certs/signing_key.pem" |
进行
1 | make -j |
全部回车默认
- sudo make modules_install -j4
- sudo make install -j4
- sudo reboot
上面命令的后面加上 -j4 表示分成4个任务运行,只为了加快速度。
deb包安装
1 | make -j4 bindeb-pkg |
rpm package
1 | make -j4 binrpm-pkg |
If the operations are performed without errors, the rpmbuild directory tree will be created in our home directory. The built rpm package will be available in a subdirectory of ~/rpmbuild/RPMS named after the architecture of the system.
1 | yum install *.rpm |
参考资料: